
Welcome to the in-depth guide for Shaper. Shaper is considered one of the hardest boss in game and has valuable item drops. In order to defeat the Shaper, you need to learn it’s mechanics and abilities.
These are the required items to open the portal to the Shaper’s Realm.
Fragment of the Chimera
Fragment of the Hydra
Fragment of the Minotaur
Fragment of the Phoenix.
Recommendations
The Shaper has one of the most difficult boss fights in game. Since it’s quite expensive to purchase/farm all the required items for the portal, it is recommended to at least learn the mechanics and boss fights before entering. One small mistake could lead to death, the Shaper could one-shot you.
- 6,000 HP (Minimum, but recommended 7000, more if Hardcore) or 8000 Energy Shield (9000 ES is ideal for Hardcore, but it can be done with 8000 if played well)
- Maxed resistances
- Additional damage mitigation (Fortify, Elemental Resistance Flasks that increases Maximum Elemental Resistance, Endurance Charges)
- Fast movement skill (Shield Charge, Whirling Blades, Leap Slam, etc.)
- Strong single target damage (The Shaper has a lot of health, way more than Guardians and you are going to need good single target damage)
Fortify
Fortify is a buff that grants the player 20% reduced damage taken from hits for 4 seconds. Fortify is always important no matter what build you have, either a caster or melee character. Fortify Support skill gem is a very good skill gem to link with your melee attack skills for melee characters, especially against Shaper. Otherwise, Vigilant Strike for any other build.
Endurance Charges
Endurance gives 4% physical damage reduction per charge. Using Enduring Cry is a good way to maintain the charges. They are even better if Endurance charges is core for your build, giving you tons of HP regeneration. For the most part, we will be dodging most of Shaper’s physical damage ability but safety comes first.
Purity of Ice
Most of Shaper’s abilities deals cold damage, which is why Purity of Ice is recommended. Purity of Ice gives additional maximum cold resistance which decreases the damage taken from Shaper. If are having trouble dodging Shaper’s abilities or surviving, feel free to drop a skill gem or aura to use Purity of Ice (Use a Lvl 20 Purity of Ice, where it gives a total of 4% additional maximum cold resistance).
Flasks
Basalt Flask has 15% additional physical damage reduction whenever on use. Basalt Flask will help by reducing damage taken from the Shaper’s melee hit which deals a lot of physical damage.
Sapphire Flask has additional maximum cold resistance on use which is really useful against Shaper’s cold attacks and mini-bosses. The unique version of Sapphire Flask, Taste of Hate is an expensive option and it can converts physical damage taken into cold damage which mitigates more damage against the Shaper. If you are on a budget, you will be just fine sticking with a rare Sapphire Flask.
Phases
Throughout the Shaper’s Realm, there are several phases a player must go through to defeat the Shaper, every phase has different mechanics. The Shaper himself has three phases. At the end of the first and second phases he sends Zana and the player to an area they must traverse with a boss waiting at the end. Killing that boss opens a portal to resume the Shaper fight. The Shaper recovers health slowly between phases.
The Shaper’s Realm (Nexus)
The Shaper’s Realm portal can be opened with the four fragments from the four Guardians of the Void. These fragments must be placed into the correct order to be activated, otherwise it won’t work. Before you can face the Shaper, you must defeat four mini-bosses. These mini-bosses are located at the ends of each wing of the Nexus, with each wing having decorations and landscapes of those respective bosses.
The four mini-bosses are randomly chosen and they have no special mods to them, aside from their normal skill sets. You should watch out for some certain bosses, which they are harder than the rest.
- Daresso, King of Swords
- Malachai, The Nightmare
- Rigwald, the Wolven King
These bosses are a little tougher because you cannot simply kill them, they will phase out and players are required to dodge the deadly attacks. Make sure to learn the mechanics before entering, remember that the mini-bosses are randomly chosen, you may be unlucky and has to face all these 3 hard mini-bosses.
Once you have defeated all four mini-bosses, Zana will be at the center of the Nexus, awaiting your arrival at the portal to encounter the Shaper.
Phase 1 – Shaper
Once you enter the portal, you will be placed in the main arena where you face the Shaper. Before moving and starting the fight, you can charge skills, place totems or traps. Once you move forward, Zana will begin a conversation with the Shaper and the fight will be engaged in a short time.
Pop your offensive flasks in the beginning of the fight and try to deal as much damage as possible. Don’t just focus on dodging the Shaper’s abilities, you need to deal tons of damage to bring this boss down. Always keep yourself busy, dodging, using movement skill, attacking, focus on Shaper and learn what he is about to do next, plan your steps and move on.
- Melee Attack – A melee attack that deals physical damage. Shaper only uses it while in close range. Use Fortify to mitigate the damage, Basalt Flask if needed.
- Golden Projectiles – The Shaper fires three golden orbs that deal massive cold damage and penetrates 25% cold resistance, one after another. Start side-stepping whenever he casts the golden projectiles, avoid getting hit by it at all cost. Use Sapphire Flask if you are unable to dodge in time.
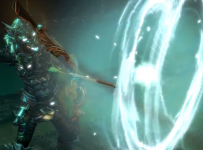
- Shaper Beam – The Shaper channels a huge golden beam that deals fire, cold and lightning damage over time. The beam only targets one location per skill usage. It may not one-shot you but you may take a ton of DOTs and your HP/ES will melt really quick. There is a brief channeling before the beam starts attacking, side-step towards the other direction as soon as you see the channeling animation. You can deal a lot of free damage by standing behind his back while he is using this ability.
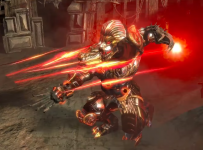
- Teleport Slam – The Shaper spins and disappears in a blanket of void, and then teleports to the player’s location, followed by a powerful slam with a large area of effect. A movement skill is recommended to avoid taking damage from this move. Whenever Shaper disappears, start using your movement skill and move around. Never ever try to face-tank it, it would probably one-shot you.
- Portal – The Shaper teleports to the side of the arena and opens a portal while he becomes immune to damage. Powerful shaped monsters exit the portal one at a time and attempt to attack Zana and the player. Meanwhile, Zana stays in the middle and attempts to channel a beam that closes the portal. This is the only time in the fight when she is vulnerable to damage. If she loses all her health, she retreats and slowly recovers health. If she is successfully kept alive for several seconds during the portal phase, the portal is closed prematurely. Best you can do is, stand in front of the portal and kill the monsters as soon as possible, preventing them from getting close to Zana.
- Vortex Balls – Additionally, slow-moving cold balls spawn once every few seconds. They don’t do any direct damage, but once the player touches them, they create a vortex that permanently stains the arena until the phase ends. Stepping in such vortex chills the player and deals cold damage over time. Always try to proc the balls around the edge, try not to spawn them in the middle which may make the Shaper fights harder.
Do not face-tank any abilities.
You are prevented from opening portals while fighting the Shaper.
Once the Shaper has been reduced to 50% health, he banishes Zana and the player and slowly regenerates life until both return.
Banishment 1
Monster in Banishment 1 provides experience, flask charges and vaal skill charges but do not drop any items. You will have to travel through this zone as quickly as you can, as the Shaper recovers HP during this banishment stage. It is not required to kill any monsters in this phase, so just kill the ones in your path who are a threat to you. At the end of the zone, there is a mini-boss you must defeat before you can enter the 2nd phase of Shaper boss fight. This mini-boss is known as the Uncreated.
You should watch out for this charging ability called Ground Slam Vortex. It deals a massive amount of damage and it takes a long time to charge so it is pretty easy to avoid it. Other than that, just don’t stand in the vortex zone and try to dodge the frost bolts as much as possible. It’s a straight-forward fight.
After you have defeated him, a portal will open to the next phase of the Shaper encounter. Before you enter this portal, ensure that you have all of your flasks and vaal skills charged. If not, quickly kill some more monsters and move through the portal.
Phase 2 – Shaper
The Shaper has the same abilities as Phase 1 but has another new ability. The Shaper casts a bullet hell of cold projectiles that deal heavy damage and are incredibly difficult to dodge, while he is invulnerable. When he does it, Zana teleports to the middle and creates a protective bubble that entirely blocks these projectiles. She doesn’t do this, however, if she’s recovering from losing all her health in the portal phase, so it’s important to keep her alive.
It is not recommended to try to dodge the projectiles, it’s almost impossible. If Zana’s protective bubble isn’t available, you should log out and enters the portal again, the fight will continue.
Additionally, the vortex balls spawn more often than in phase 1.
Once the Shaper has been reduced to 25% health, he once again banishes Zana and the player and slowly regenerates life until both return.
Banishment 2
In the second banishment, it’s pretty much the same zone as the first banishment. Has same mechanics as the first banishment, so move quickly to the end of the zone to face another mini-boss, which is known as the Unshaped.
The Unshaped has the same exact skill set as the Uncreated but with a new skill. The Unshaped casts 6 Frostbolts in a half circle on either side of him. If you are a melee character, spread out and keep a safe distance. Being at close range could be really deadly.
Like the first banishment, remember to keep your flask or vaal charges up after the mini-boss, before entering the portal. Once the Uncreated has been defeated, a portal opens up the last phase of the Shaper encounter. Prepare yourself exiles.
Phase 3 – Shaper
This is the last phase of Shaper, if you bring his health to 0%, you beat him. Shaper on this phase has the same abilities from phase 1 and 2 but has a new ability. He can summon an invulnerable spectral double that uses one of his skills, which disappears after several seconds. Additionally, the vortex balls appear significantly more often than in the previous phases, potentially making most of the arena unsafe and leaving very little room for maneuvering.
There is nothing much you can do to his clone other than avoiding his abilities.
Notable Drops
 Dying Sun
One of the best flask in game to help clearing the map quicker. It increases up to 15-25% Area of Effect and skills fire 2 additional projectiles during flask effect. On top of that, it’s a Ruby Flask which is very useful against fire damage. It has a rare drop rate, most valuable drop from the Shaper.
 Starforge
One of the highest physical DPS swords in game. It even has +90-100 to maximum life, which other regular weapon doesn’t has. Has increased area of effect and makes physical damage shocks. Downside is, you are not able to deal elemental damage ever. It has a slightly lower drop rate. You can make some really unique builds with this sword.
 Shaper’s Touch
Most common drop from the Shaper. It doesn’t worth much in the market. Although, this glove is needed for some unique builds.
Voidwalker
Same as Shaper’s Touch, common drop and doesn’t worth much. It is still a really good boots overall, especially for budget builds.
