
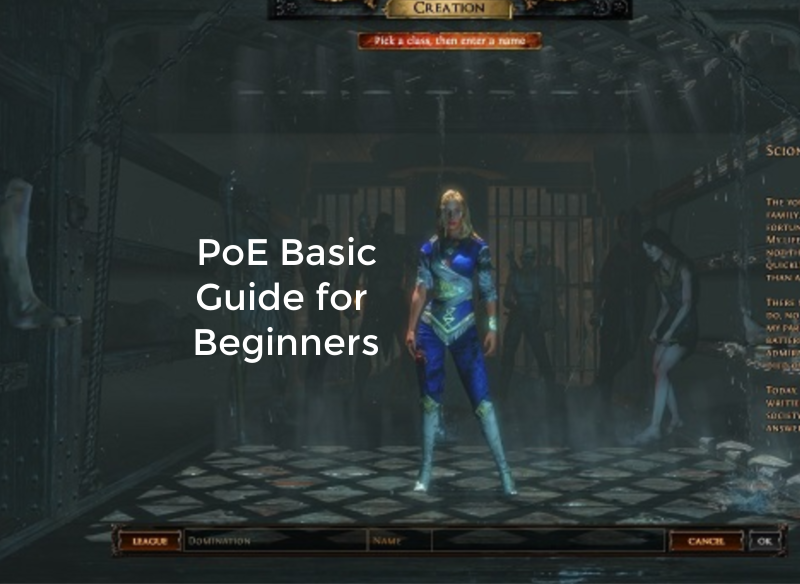
Welcome to the ultimate guide for Path of Exile (PoE). This guide will help you understand the game better and what are some important things you need to look for.
Character Skills
The game has a wide range of skills that you can use. For a beginner, this will overwhelm you. The cool thing is that any character can use any item or skill as long as they meet the stat requirements. The whole game revolves around choosing the most optimal skill for your build and character. Each character has 3 stats. They are strength, dexterity and intelligence. If you have played Diablo 1/2/3, these will be familiar to you.

Strength
The main stat for most melee characters.
- 2 Strength = +1 Maximum Life
- 5 Strength = +1% Melee Physical Damage
If you start off as a Marauder or Templar, you will have access to more strength nodes on the passive skill tree which we will go over in the “Passive Skill Tree Section”. This stat is the best for melee based characters and also certain niche builds. Life provides survivability, which you will need when fighting tough bosses and end game maps.
Dexterity
The main stat for ranged or fast attacking characters.
- 2 Dexterity = +2 Accuracy Rating
- 5 Dexterity = +1% Evasion Rating
The Ranger and Shadow have access to more dexterity at the start of their skill trees. Dexterity improves accuracy, which allows you to hit monsters and not miss. Evasion rating helps with dodging more attacks and suits builds that have less health and need to rely on avoiding attacks for survival.
Intelligence
- 2 Intelligence = +1 Mana
- 5 Intelligence = +1% Energy Shield
The Witch has the most access to intelligence nodes on the passive skill tree. This stat is great for builds that focus on energy shield as the extra % increase in Energy Shield gives your character a bit more survivability.
Which Stat to Focus On?
This will depend on your build. But generally, you want strength for melee builds, dexterity for damage/ranged builds, intelligence for energy shield or spell heavy builds.
There are currently seven classes available:
- Marauder – Strength
- Ranger – Dexterity
- Duelist – Strength/Dexterity
- Shadow – Dexterity/Intelligence
- Templar – Intelligence/Strength
- Witch – Intelligence
- Scion – Anything Goes
Scion is only available once you find her in Upper Sceptre of God in Act 3 and free her from cage.
The cool thing about your class is that you get to be creative. Just because you play a Marauder doesn’t mean you need to play it as a melee tank with good damage. It is all dependent on your skills and what you want.
When it comes to stats, you will need to choose which one you want to focus on:
- Life Build – Stacks life as your main defense. The good thing about life builds is that you get the best return with life flasks. However, life builds get expensive when you try to get your character to 8000+ or more life. Life can also be regenerated via % regen passive nodes and items.
- ES Build – Also known as the energy shield build. Unlike life, energy shield recharges after you character hasn’t been hit for a few seconds. Energy shield can also regenerate via %regen on items. Faster recharge of energy shield also improves your survivability. ES build also goes very well with Chaos Innoculation passive node, which makes you immune to chaos damage and drops your maximum life to 1.
- Hybrid Build – Has a mix of life or ES. Not the most popular because you will have to balance life and energy shield. But some builds are suitable using this. Energy shield is depleted first before life is taken when you get damaged. Do keep in mind chaos damage bypasses your energy shield and your life will take damage. So if you are running a low life hybrid build, you can die from chaos damage if you don’t have enough chaos resistance.
- MoM Build – Also known as Mind over Matter. This is a passive node on the skill tree that allows the character to direct 30% damage taken from life to mana. That means if you have high mana recovery, this build can help mitigate a lot of damage.
Elemental Resistance
Resistance is one of the important part of defense that you won’t want to neglect. There are primarily 4 resistances you need to pay attention to:
- Fire Resistance
- Cold Resistance
- Lightning Resistance
- Chaos Resistance
Now the max resistance for each element is 75%. You can raise the cap resistance via items or passive skill nodes. Below are some items that can do that. Corrupted items on a chest piece can also raise max resistance by 1%.


You might wonder why having higher cap resistance is a big deal. The end game bosses such as Shaper, Elder/Uber Elder, the Guardians all do a lot of elemental damage. You will need specific elemental damage mitigation to survive some of their attacks. Plus, dying at 95+ is devastating as you get penalized heavily on experience (-10%). Below is a basic calculation on how vital resistance can be by whitesushii:
How good is maximum resistance?
Let’s take a look at the Shaper’s projectile attack which according to the wiki, deals 5639 to 8458 Cold Damage and penetrates 25% Cold Resistance. Assuming
-
Worst case scenario and the projectile does maximum 8458 cold damage
-
The resistance penetration does not exist
For a player who has his resistances capped at 75%, he will take
8458 * (1 - 0.75) = 8458 * 0.25
                  = 2115 Damage
For another player who has his resistances capped at 76%, he will take
8458 * (1 - 0.76) = 8458 * 0.24
                  = 2030 Damage
Taking 1 – 2030/2115, we find that the 1% difference in maximum resistances results in approximately 4.02% actual damage mitigation. I have actually plotted the table in google spreadsheet but also included it partially below for easier reference
| Max Resistance | Effective Damage | % Additional Mitigation |
|---|---|---|
| 75 | 2115 | 0% |
| 76 | 2030 | 4.02% |
| 77 | 1945 | 8.04% |
| 78 | 1861 | 12.01% |
| 79 | 1776 | 16.03% |
| 80 | 1692 | 20.00% |
| 81 | 1607 | 24.02% |
Now if you are just starting the game, it won’t be too hard until you completed the story mode and heading to do Atlas maps. Also, once you complete act 5, you will get permanent -30% resistance. Upon completing act 10, you receive another -30% resistance penalty. That means if you want to cap your resistance, you will need the following:
- 135% total elemental resistance (excluding chaos resistance) to get a display of 75% after completing act 10
- 169% total elemental resistance to take into account “elemental weakness” affix in atlas red maps
As for chaos resistance, it is not necessary to max it unless you are going for a low life or ES build. Not too many chaos attacks are as deadly that will one shot your character, so as long as you have enough health and reflexes, you should be able to chug pots in time for recovery.
Armor and Physical Damage Reduction
Armor helps mitigate physical damage, but it has a slightly different calculation against large hits that deal a lot of damage. Below is an example:
| Armor | Damage Dealt | Resulting Damage | % Mitigation in 2.0 | Mitigation with 100% Granite (based off %increased on tree field to the right) |
|---|---|---|---|---|
| 500 | 500 | 455 | 9.1% | 58.3% |
| 500 | 4000 | 3,951 | 1.2% | 14.9% |
| 500 | 8000 | 7,950 | 0.6% | 8.0% |
| 2000 | 500 | 357 | 28.6% | 66.7% |
| 2000 | 4000 | 3,810 | 4.8% | 20.0% |
| 2000 | 8000 | 7,805 | 2.4% | 11.1% |
| 15000 | 500 | 125 | 75.0% | 87.8% |
| 15000 | 4000 | 2,909 | 27.3% | 47.4% |
| 15000 | 8000 | 6,737 | 15.8% | 31.0% |
As you can see, stacking a lot of armor has diminishing returns in terms of physical damage reduction. It is much better to have some armor (about 2000 seems to be good for many builds). Endurance and fortify is a much better way to mitigate more physical damage compared to pure armor.
With flasks being able to give you flat armor and % armor increase, most builds can afford to go with not much armor at all.
Evasion, Dodge and Blocking
So the good thing about stacking evasion is that you completely avoid incoming damage. The bad news is, the max cap for evasion is 95%. So eventually, you will get hit. This applies to attacks only.
Unlike evasion, dodge can apply to either spells or attacks. Spell dodge is explicitly stated, where as if the word “dodge” is only present, it is assumed that this applies to attack dodge. It is also important to note that dodge is pseudo-random, and is capped at a 75% to dodge. You can’t dodge everything. Spells have a separate type of dodge you need called spell dodge.
It is important to note that there are two components that matter when determining if you will evade an attack. It is your evasion rating and the enemy’s accuracy. Generally, white mobs have less accuracy then blue/yellow/unique mobs, which means your dodge is less effective against stronger enemies.
Similar to dodge, blocking can apply to either spells or attacks. Blocks spells is explicitly stated. However, if this is not explicitly stated, it is assumed that the block change applies to attacks only. Block chance is probability-based, and similar to dodge, is capped at a 75% chance to block. You can’t block everything. You can also increase the maximum block rate via +% maximum block chance via corruption or unique items like Lioneye’s Remorse.
The Passive Skill Tree
This is probably one of the more complicated and confusing part, especially for new players. Since there are so many ways to build your skill tree, new players get overwhelmed and therefore prefer to have someone guide them on how to build one. Each class starts on a different part of the tree.

- Witch – Has access to mostly intelligence and energy shield passive nodes at early levels (1-30)
- Templar – Has access to a mix of strength and intelligence passive nodes at early levels (1-30)
- Marauder – Has access to strength and life passive nodes at early levels (1-30)
- Duelist – Has access to a mix of strength and dexterity passive nodes at early levels (1-30)
- Ranger – Has access to dexterity and evasion passive nodes at early levels (1-30)
- Shadow – Has access to a mix of intelligence and dexterity passive nodes at early levels (1-30)
- Scion – Starts in the middle and can have access to any side of the skill tree. You can even start on 2 different paths if you choose to.
When you level up each time, you gain a skill point. You also can get additional skill points from optional quests from the story mode. Over the playthrough, characters receive 22 passive skill points (up to 24 including the bandit quest rewards) and 20 skill refund points. So the total skill points you can have in the game is 123 at level 100.
Now when you are building your character, you will want to plan your skill points up to level 90, which is 113 skill points if you completed all the side quests. Anything after that is luxury and most good builds can be completed at around 90.
When planning your tree, you also need to take into account the items you plan to use as it will alter your path. However, you can also use orb of regret to change your skill tree if you happen to mess it up. So don’t worry too much about it.
The skill tree is versatile and allows you to balance offense/defense. Your playstyle will dictate how you go about your skill tree. For example, if you are all out offense, you would sacrifice life/energy shield passive nodes over % damage increase of a specific weapon or % elemental/spell damage for casters.
For people that love killing fast, you will more or less invest more damage over survivability. For example, here are a few builds with low HP but high damage:
While these builds kill fast, you will die sometimes if you mess up. If you prefer tanky builds, then below are some examples:
- Guardian Righteous Fury Build – Tank End Game Content
- Molten Strike Juggernaut All Content and Tanky
Keep in mind that some of these builds aren’t cheap, so for beginners, you want to look for builds that has a low currency cost. Below are some that are great league starters:
These builds are a lot cheaper to start and does not require a heavy amount of currency investment to perform at top level. The more you invest, the better the build becomes.
Passive Keystones
Passive key nodes can make your life easier or harder depending on which ones you choose. So you will want to make sure you are picking up key nodes that are beneficial for your build.
For example, if you are doing a life build, then you will want to path your skills towards the marauder area, where most of the % life increase nodes are at. The Blood Magic keystone will allow you to spend life instead of mana when casting skills. This means you will never have to worry about running out of mana. If you are running a skill like molten strike or shrapnel shot, then the Point Blank keystone will improve the damage dealt when enemies are up close. These keystones are meant to greatly improve your damage or defense when you pick them up.
Here are some popular keystones people pickup depending on the build:

Vaal Pact – Doubles life leech per second + maximum life leech. The downside is you no longer regen life. This keystone can make you facetank end game bosses like Uber Elder or Shaper with ease. Check it out below.

Mind over Matter – 30% of Damage is taken from Mana before Life. A great defensive keystone that allows you to mitigate damage with mana. Very popular among high mana regen/recovery builds.

Elemental Equilibrium – Enemies you hit with Elemental Damage temporarily get +25% Resistance to those Elements and -50% Resistance to other Elements. This keystone is great for builds that want to deal extra elemental damage of their choice.

Chaos Inoculation – Maximum Life becomes 1, Immune to Chaos Damage. This is great for pure energy shield builds.
A great tool where you can plan your skills is Path of Building tool. You can download here. It allows you to copy someone else’s build and help you build yours.
This tool calculates DPS for skills and also gives you the shortest path to whatever keystone you are looking for. I highly recommend you check it out.
Items and Sockets
Items and unique skill combinations in sockets is what makes this game so fun. You get to be as creative as you want while building something that is viable for currency farming or end game content.
Items are what makes a build very powerful when you find the right combination. Each item can have more than one affix. The rarity of the item determines how many affixes it can have.
- White – No affixes
- Blue – 2 affixes
- Yellow (Rare) – Up to 6 affixes
- Brown (Unique) – Varies and have special properties not available to rares
You might think that uniques are the best items, but rare items can be even more valuable if you happen to get the right stats for the right item. The good thing is that most uniques are usually easy to get and cheap. This is especially helpful when you start a new season where items are harder to come by during the first few weeks of a new temporary league.
As I have mentioned, some rares are very valuable when you get the right stats for the right item. That is why crafting is so expensive as it can give you the most powerful item with all the desired stats. Below are some examples:


As you can see, these are not items you can get from just identifying rare items. Meta crafting is required to get these top items. The good news is, you won’t need these items to beat the game. It is more of an end game luxury item. These are the items that people use to make highlight reels to kill end game bosses like Shaper in 10 seconds.
Sockets
Sockets allow you to input skill gems. Now each item can have sockets and can have either red(strength), blue(intelligence) or green(dexterity) sockets. Some items or corrupted items can have white sockets which will allow you to put in any color gem you want in it.
Below are the the maximum number of slots each item can have:
- Bows, 2-Handed Weapons and Armor = 6 slots max
- 1 handed weapon and shields = 3 slots max
- Gloves, helmet and boots = 4 slots max
- Unset Rings = 1 slot
- Belts = Only Stygian Vise belt can have 1 slot (unique Stygian Vise has 2 slots)
Amulets can’t have any slots. Also keep in mind that your item needs to meet a certain level requirement in order to get to the maximum slot available to an item.
| Number of sockets | Minimum item level | First vendor |
|---|---|---|
| 1 | 1 | Act 1 |
| 2 | 1 | Act 1 |
| 3 | 2 | Act 1 |
| 4 | 25 | Act 3 |
| 5 | 35 | Act 4 |
| 6 | 50 | Act 6 |
For example, a two-handed item can’t have 6 sockets if its item level is level 35. To check an items level, you hover over it and click “Alt” button on your keyboard to find out. An item’s level is also the same level as the difficulty area. If the level of the area is 55, then the items that drop will also be level 55.
The item level item is generally applicable, but note that there are a few cases where the restriction does not apply:
- Hillock, upon death, always drops a specific weapon with three differently coloured sockets, which is dependent on your class.
- Tabula Rasa always has 6 linked white sockets.
- Items from strongboxes with of Complexity affix
- Vorici can master craft sockets regardless of the item’s item level.
Socket Linking and Gems
Sockets can also be linked and having them linked allows you to strengthen an active skill gems with supporting skill gems. Below are some common link combos that is used:
3 Links
- Whirling Blade/Shield Charge/Leap Slam + Faster Attacks + Fortify
- Cast when Damage Taken + Immortal Call/Phase Run + Increased Duration
4 Links
Curse on Hit + Ball Lightning + Greater Multiple Projectiles + Enfeeble/Frost Bite/Flammability/Conductivity
Check out this non utility setups that will be useful for specific builds here.
Builds
This is probably the most confusing part for most beginners. With so many different ways to build a character, it is very easy to get overwhelmed. If it is your first time playing, my best advice is to look at a pre-made guide by a seasoned player or play it blindly. Both ways are fun, but the latter is more costly as you will make more mistakes and will most likely make a character that won’t do too well.
Engineering Eternity has a great video on giving you a good idea on how to build a character. To help decide a build, you will want to ask yourself the following questions:
Melee or Ranged?
Determining whether you are melee or ranged is vital. Some skill gems are melee only, some are ranged and it will change your play style. If you choose melee, you will be taking more damage since you get hit more often. That means you will want skill gem setups that focus on reducing or mitigating damage. The good thing about being melee is that you have some skills like fortify that will help reduce physical damage. It also suits people that just want to bash monsters in the face. The downside for melee is that you will need to avoid big hits like Shaper slam or Minotaur burrow and usually not the best for speed runs.
If you choose ranged, then you will cater your build around more damage as the goal is to kill as fast as possible without getting overwhelmed by monsters. You will also take less damage if you can kill fast enough, even against bosses. Skill gem setups will most likely focus on speed and evasion. The downside to ranged is that you will need to kite enemies and will for sure need avoid big hits as your odds of surviving them is low.
There is also minions that you can utilize as a build, but they are usually for Necromancer(Witch) and Scion.
AoE vs Single Target?
Now you will need to decide which skill to use as your primary skill that will be used to clear 90% of the content. That will be killing packs of mobs. The other 10% is against unique bosses. For clearing packs of monsters, you will want a skill with decent area of effect (AoE). For unique bosses, it is best to use skills that have high single target burst damage.
Here are some examples of good single target active skills:
- Blade Flurry – Probably one of the best single target skills with a bit of AoE. It is a channeling skill, so you will stand still for the most part.
- Molten Strike – One of the most consistent damage skills available and can also serve as a decent AoE attack with enough molten ball projectiles.
- Barrage – Very popular skill choice for rangers against bosses.
- Heavy Strike – A strong single target attack with limited range. Best against bosses.
- Elemental Hit – A strong ranged attack that is very common for Rangers for patch 3.3. Could be nerfed in the future.
Examples of some AoE skills:
- Reave – A good AoE skills that increases in range and area upon each hit. Stacks up to 4 times. Great for clearing monster packs, terrible for bosses.
- Glacial Cascade – A hybrid AoE attack with 40% physical, 60% cold. Has a smaller AoE range but can also be used against bosses for decent damage.
- Cyclone – Spin to win attack and is popular among players. Great clear and can be good against bosses with some tweaks.
- Earthquake – Large AoE but does poorly against bosses.
- Righteous Fire – A very popular build for lazy folks once it is setup correctly. Requires high life regen and +max fire resistance.
- Blade Vortex – A very strong skill for clearing monster packs and decent against bosses. Does require a bit of charge up and can be annoying for some players.
- Tornado Shot – Popular skill for Rangers to clear monster packs off screen.
Try them out and see which one works the best for you. You end goal will always be to 6 link your armor or weapon to get the best damage possible with good support gems.
Do I want more damage or survivability?
After you have picked your main skill gems, it is time to decide how to balance your character. If you kill fast but die often to big hits, then you want to invest more to life, assuming that you have all your resistances capped out.
For more damage builds, you will want to path towards damage nodes for you class. If you are physical weapon focused, you will want to path the bottom side of the skill tree, which has plenty of % damage increase for various weapons like claws, axes and swords. For spell damage, most of them are located on the top half of the skill tree where the witch starts.
Also, the passive skill tree changes slightly every few patches, so you will have to tweak your build a bit every patch.
Currency
Path of Exile doesn’t has an actual “currency system” – For example, it doesn’t has any gold, money, in-game cash or any sort. Due to this particular reason, orbs has been made into a reliable source of currency to trade, sell and buy items. The most commonly used currency in Path of Exile is Chaos Orbs and Exalted Orbs.
Each currency item serves a specific function in the crafting and enhancement of a character’s equipment, or allowing restructuring of the character’s passive skill tree in the case of the Orb of Regret. Here are the currency items.
Currency Items
Scroll of Wisdom – You can find this scroll commonly throughout the game, sometimes even too much. It almost has no value because you can find them so easily. Scroll of Wisdom can identify an unidentified item.
Portal Scroll – Just like Scroll of Wisdom with different function. Has no value and you will find too much of these. Once used, it can create a portal to town.
Armourer’s Scrap – Used to improve the quality of a piece of armour. Each scrap applied to an armour will increase its quality by up to 5% depending on its rarity. No value but useful, can increase the total of Energy Shield, Armour or Evasion of an armour piece.
Blacksmith’s Whetstone – Can be used to improve the quality of a weapon. Each whetstone applied to a weapon will increase its quality by up to 5% depending on its rarity. No value but useful, can increase the total DPS of a weapon.
Orb of Transmutation – Another common orb that you can find easily from monster drops. Orb of Transmutation can upgrade a normal (white) item into a magic (blue) item.
Chromatic Orb – Common currency item used to re-roll the colour of sockets on a weapon or piece of armour.
Silver Coin – Used for prophecies by talking to Navali. Uncommon and not much value.
Orb of Augmentation – Common but very useful for crafting. Enchants a magic (blue) item with a new random modifier.
Orb of Alteration – Commonly found from monster drops and from selling equipments to vendor. One of the most important orbs needed for crafting. Reforges a magic item with new random modifiers.
Glassblower’s Bauble – Uncommon but these has no value, although these are useful. Used to improve the quality of a flask. The amount of quality raised depends on the rarity of the flask.
Orb of Annulment – The Orb of Annulment can be used to remove a random modifier from a magic or rare item. Uncommon and can be dropped by slain monsters, chests, and destructible containers. They can also be obtained by combining Annulment Shards, which are dropped exclusively by Harbingers.
Orb of Chance – Used to upgrade a piece of normal equipment to a random rarity. Commonly found and used for “gambling” end-game uniques. For example, using Orb of Chance on a normal Glorious Plate in hope of getting Kaom’s Heart, an unique version of the item base.
Orb of Alchemy – Can be used to upgrade a piece of normal equipment to rare. Usually used for trading cheap items or upgrading a white map into a rare one.
Orb of Fusing – Uncommon, used to re-roll the links between sockets on a weapon or piece of armour. The colour and number of sockets remain unchanged. Everyone needs a 6-linked item, Orb of Fusing are always in demand.
Orb of Scouring – Used to remove all random modifiers from a magic or rare piece of equipment. Implicit modifiers, quality, sockets, and links are not removed, as well as affixes protected by meta-crafting mods. Needed for crafting best-in-slot rare equipment.
Jeweller’s Orb – Used to re-roll the number of sockets on a weapon or piece of armour. The maximum number of sockets is still limited by the type of equipment and item level. Common but valuable.
Blessed Orb – Can be used to re-roll values of the implicit modifiers on a piece of equipment. (This means the top values of an item above the line and not the bottom 6 values) This can only be used on an item that actually has implicit modifiers that can have a range of values. Considered as a rare currency item.
Cartographer’s Chisel – Uncommon and used to improve the quality of a map. The amount of quality given depends on the rarity of the map.
Apprentice Cartographer’s Sextant – Adds an atlas modifier to a white map (tier 1 to 5) on the Atlas of Worlds.
Journeyman Cartographer’s Sextant – Adds an atlas modifier to a white or yellow map (tier 1 to 10) on the Atlas of Worlds.
Master Cartographer’s Sextant – Adds an atlas modifier to a any map on the Atlas of Worlds.
Gemcutter’s Prism – Also known as GCPs, used to improve the quality of a gem. Each Gemcutter’s Prism will always raise the quality by 1%. Rare item but has lower value compared with the rare currency items.
Orb of Regret – Used to gain one passive skill refund point. Uncommon. Slightly lower drop rate than Chaos Orb, which can be a good thing.
Regal Orb – Upgrade a piece of magic equipment to rare. The current modifiers are all retained and one new random affix is added. Rare currency item and needed for crafting.
Vaal Orb – Corrupts an item, causing unpredictable and possibly powerful results. Once an item is corrupted, it can no longer be modified by any other currency.
Chaos Orb – The “main” currency to sell or purchase any sorts of items. Can be used to re-roll the random modifiers on a piece of rare equipment. Chaos Orb are harder to find compared with Orb of Fusing, Orb of Scouring, etc.
Divine Orb – Can be used to re-roll the values of all random explicit modifiers on a piece of equipment. Divine Orbs are extremely rare currency items that can be dropped by slain monsters, chests, and destructible containers. They can also be obtained by selling a six-linked item to a vendor.
Exalted Orb – Just like Chaos Orb, the “main” currency to sell or purchase an item but has way more value. Can be used to enhance a piece of rare equipment with a new random affix. Extremely rare drop rate.
Mirror of Kalandra – Mirrors of Kalandra are the rarest and most valuable currency items in the game. They can be dropped by slain monsters, chests, and destructible containers (including Arcanist’s Strongboxes). They are over a thousand times rarer than
Exalted Orbs, and only a tiny fraction of players will ever find one as a drop. Can be used to create a mirrored duplicate of any piece of non-unique equipment, non-corrupted item, or map that is not itself a duplicate. It resembles the Path of Exile logo. Only end-game players would use this currency item to mirror a best-in-slot equipment.
Trading

Trading, buying, or selling is a featured system in Path of Exile. You can play the game without trading with other players, there is a special league called SSF (Solo Self-Found). This league means that you cannot interact with other characters, which disables features like trading or partying.
Trading is the act of exchanging items or currency items between characters. In Path of Exile, this generally happens between two players. Trading is an important part of the game, and unlike many other games there is no auction house, market or money system (e.g. gold or coins). Instead there are various currency items (scrolls and orbs) in a ‘barter economy’ where players need to meet up before they can complete the transaction.
To trade with another player, right-click on his/her character and select “trade”. When that player is in the same party, right-click the character’s portrait on the left side of the screen and select “trade”. Beware of scammers, always check the item that the other character offers and it is indeed the one you desire.
If an account does not have a character that is at least level 25, it cannot trade currency or unique items to other players in the trade window. To circumvent this, you could drop currency or uniques in a zone in order to give them to other players.
To make your trading life easier, there are many useful third-party sites that can help trading. There will be more information about third-party sites below.
Play Modes
In many other games, you would call it “Play Modes” but in Path of Exile, we call it “Leagues”. Leagues in Path of Exile represent the game worlds that characters exist within. A single character can only belong to one league at any time, and can’t interact with characters outside that league.
Permanent Leagues

There are four permanent leagues in Path of Exile, which are the Standard, SSF Standard, Hardcore and SSF Hardcore.
Standard – Standard is the default league that has no modifiers.
Hardcore – When a character dies in a Hardcore League, it will be moved to Standard league.
In addition to standard and hardcore, a Solo Self-Found (SSF) variant for each exists. In these leagues, player’s can’t trade or party with other players and have to rely solely on the items they find themselves.
SSF Standard – Default league with no modifiers.
SSF Hardcore – Has hardcore modifiers.
Temporary Leagues
Temporary leagues have a set duration, which can vary from 12 minutes to four months. They are usually defined by specific modifiers or features that the permanent leagues don’t have. When a league ends, the characters are not lost but transferred to one of the permanent leagues. There are also option to pick Hardcore, SSF or both in the new leagues.
Challenge Leagues
Challenge leagues are usually three or four months long. These leagues are intended to introduce and test new content while providing players with fresh economy, making the game more exciting. These leagues has a set of optional challenges that can be completed for a prize, which are usually cosmetics and hideout decorations.
Race Leagues
Race leagues are temporary leagues created specifically for a single race event.
Private Leagues
Private League is a new feature in Path of Exile. Private leagues are purchasable, custom made leagues that allows adding additional modifiers that make Path of Exile more challenging. Private leagues can be based around the permanent leagues or the current challenge league.
Additional modifiers can be added to the league, such as increased monster stats, no flask refill at towns, or disabled vendors or stash. Additional league duration and player slots can be purchased with points, with the option to allow other players to contribute to the purchase.
Leveling and Partying

Leveling
In order to level a character up it is necessary to get more experience. Currently there is only one source for experience in this Path of Exile, which is killing monsters. Every monster gives experience depending on the type of the monster, its rarity, the area level and certain stats affecting the monster or the area it is in. The total of experience needed for each level increases as you leveled up.
Death
There will be loss of experience upon death. The penalty is a percentage of the total required experience for the next level.
- Act 1 -5 : 0% experience loss
- Act 6-10 : 5% experience loss
- Any area from Map Device : 10% experience loss
Partying
A total of six players are allowed to be in each party to play together. Players can create or join public parties by clicking on the Notice Board in town, or by pressing S to open the Social window. Players can also invite someone to a party by selecting a player’s name in chat, clicking on them in town, or typing /invite "playername" in the chat.
In order to balance things, there will be plenty of effects on the monsters, loots, experiences and flasks.
- Monsters: Monsters gain extra life for each additional party members. Additional 20% in Act 1-5, 40% in Act 6-10 and 60% in any area from Map Device.
- Loot: +10% increased item quantity and 40% increased item rarity for each additional member. For skill gems and currency items, party members add 50% increased item quantity and 0% increased item rarity. Bonuses to item rarity or quantity from modifiers on player gear are only counted from the player who lands the killing blow.
- Experience: There will be more experience gained for each additional party members.
- Flasks: Party members of a character landing the killing blow on an enemy will gain flask charges if they are nearby.
Atlas Map

Maps are the end-game content in Path of Exile. By placing the maps in the Map Device, it will create a randomized instance in which monsters can be fought. Like equipment, they come in normal, magic, rare, and unique rarities and have their own special affixes.
Affixes on maps can make them more difficult but also increase their potential rewards. Maps can also have quality, which can be raised by using a Cartographer’s Chisel. Map drops are not affected by party size.

Players cannot use maps until they have access to the Templar Laboratory, which can be accessed in the Epilogue after Act 10. They can later also be used in hideouts, if the player has a personal map device, offered by Zana. The map device in The Chamber of Sins Level 1 (Act 7) can also be used to open map, which the same device was used to open portal to Maligaro’s Sanctum. However, only players that had the access to the Templar Laboratory, can reuse the device to open map.
Tiers
There are four tier of maps, which are the white, yellow, red and the guardians.
- White Tier: Tier 1-5, Level 68-72
- Yellow Tier: Tier 6-10, Level 73-77
- Red Tier: Tier 11-15, Level 78-82
- Guardians Map: Tier 16, Level 83
- Shaper: Tier 17, Level 84
Crafting

Crafting refers to creating or improving items with certain orbs and other currency by adding and removing modifiers. Crafting is not a feature for new players. It requires a lot of knowledge and currency to forge a strong equipment.
Path of Exile’s in-game currency is required for both crafting and trading items. Since most crafting techniques are costly and unpredictable, only the most successful crafting attempts are efficient. As a result it is often preferable to buy a desired item from another player instead of crafting it yourself.
Here is a basic-crafting technique you should know.
- Use an
Orb of Transmutation on a white item to upgrade it to a magic item.
- Use an
Orb of Chance on a white item to get either a magic, rare or unique version of the item. The rarity is chosen completely randomly, although higher rarities are very unlikely.
- Use an
Orb of Alchemy on a white item to upgrade it to a rare item.
Useful Sites and Tools
PoE Forum – Official Path of Exile forum. You can read all the new announcements, patch notes, character builds here.
PoE Trade – A website that you can use to buy or sell your items or orbs. The result after you searched a specific item will always comes the cheapest ones first. PoE.Trade is a very reliable 3rd-party trade website, it is very convenient, quick and safe.
PoE TradeMacro – An Autohotkey (AHK) script that provides several convenient QoL features for Path of Exile Trading. This includes automatic price check macro.
Path of Building – Path of Building is an offline skill tree application that has the options to input items, jewels and calculate total health, DPS, defenses, etc. Very useful to plan and create a build.
Shortcuts and Commands
The easy way to go to your hideout from any town is by typing /hideout. This will instantly teleport you to your secret hideout. You can’t do that in battle areas though.
There are many useful commands such as:
- /deaths – Displays how many deaths the current character has incurred.
- /played – Displays the length of time the current character has been played.
- /help – Displays a list of most console commands.
- /itemlevel – Displays the item level of selected item.
- /afk – Turns AFK mode on.
- /dnd – Do not Disturb mode, no messages will be received when someone messaged you.
- /global # – Joins the global chat channel #
- /trade # – Joins the trade chat channel #
- /exit – Exits the game to the Character Selection screen.
)